Tuesday, October 28, 2008

Balancing Act


The logs were laying every which away. They were huge logs and some would be balanced on top of others. This big one was proped up on a smaller one. Makes you wonder why it doesn't fall, and when will it happen. I just hope on one is under it when it happens.

Monday, October 27, 2008

Not a Typical DL-1

Chrome Raleigh Lady's Tourist

Over the years I've been fortunate enough to befriend some very serious bicycle collectors. And I understand enough about how they operate to know it is unlikely that I will ever be one of them. I have a strong aversion to online auctions. I am unwilling to spend my weekends traveling across state lines to visit bike swaps and barn sales. Space is an issue. Andmost importantly, my tastes in bikes are too varied. But if there is one bicycle in which my interest has remained consistent, it is the Raleigh DL-1 Lady's Tourist.


I acquired my first one in - a run of the mill 1973 model in so-so condition - and "frankenbiked" it into a working city steed which I still ride today. The second Lady's Tourist was practically forced into my hands half a year later. The 1930s model was covered in surface rust and I did not want it. Where would I keep the filthy thing? But the gentleman who offered it insisted I was the rightful owner: "Take it. It is completely intact and that rust can be removed. You won't regret it." He was correct. It is a historically significant treasure that I look forward to carefully restoring some day.


Chrome Raleigh Lady's Tourist
At that point I knew that I would have a collection of DL-1s in the future; it was just a matter of time and luck. I did not intend to buy up random Raleigh Tourists; I was interested in specific things.An all-original model from the 1940s-50s was one of them. A pre-1930s model was another. And then there was the one that seemed least likely to surface: the chrome Tourist. But two years later, surface it did - in the hands of a collector in Germany, who did not want it for himself and promptly offered it to me. I was not prepared, but a chance like this does not come along often and after a feverish correspondence the bike was mine. The machine arrived completely disassembled and packed into a standard sized box in the most expert manner I've ever seen. It took us some time to put it back together, but finally we managed and here it is: a chromeRaleigh DL-1 Lady's Tourist.


The proportions of the 22" frame are identical to my 1973 bike. The hub is stamped 1980. "Raleigh Nottingham" headbadge. Most of the parts are original. The amount of wear suggests the previous owner rode it for years on a regular basis, but did not store it outdoors.


Chrome Raleigh Lady's Tourist
Aside from their eye-catching finish, what makes chrome DL-1s interesting is that historically they are somewhat of an enigma. On several occasions, Raleigh released limited edition All-Chrome versions of their roadster models. Originally these were made only for dealers as demos or display models. In later decades chromed editions began appearing in catalogues.In theory it is possible to find a chromed Raleigh roadster from any number of decades, made for any number of markets. The best known of these today is the Boss Bike - a balloon tire chromed Superbe Roadster produced for Raleigh's African market in the 1970s. There was also a chromed DL-1 produced for the German market through the late 1970s and early '80s. My bike is an example of the latter.


Chrome Raleigh Lady's Tourist

One very cool thing about the bike is the locking fork. Unfortunately, the key is missing. I will look into whether it's possible to get a duplicate made.


Chrome Raleigh Lady's Tourist
Also missing is the observation insert on the chaincase. The rear of the chaincase is slightly crumpled, but we are working on fixing that. The bike needs new cotters, and the headset could use repacking or replacing. Otherwise there is no damage.


Chrome Raleigh Lady's Tourist
A couple of things are not original, such as these newer tires (which ride great). The headlight and bottle generator are missing, though I do have the original tail light.


Chrome Raleigh Lady's Tourist
I initially thought these pedals were not original, but have since seen similar ones on other chromed Raleighs. The seller sent me these along with a set of the more typical Raleigh platform rubber pedals, but these are nicer and less than half the weight.


Chrome Raleigh Lady's Tourist

It looks like the grips were replaced by the previous owner after the originals wore out. The fit isn't quite right, but they feel and look fine, so I will keep them until I can find a better alternative. Late 1970s - early '80s Sturmey Archer trigger shifter.


Chrome Raleigh Lady's Tourist
The bolted rear triangle and fork ends are identical in design to my standard 1973 DL-1.


Chrome Raleigh Lady's Tourist
The rod brakes, however, are a little different. I need to take close-ups of the other bike for a comparison. They need new brake pads, but work reasonably well in the meantime. The rear one is stronger than the front.


Chrome Raleigh Lady's Tourist
My understanding is that originally these bikes came with Brooks B33 saddles, but it was missing here. The seller included a spare from his personal collection, which is a brown Brooks "Champion B66 S.T.R." This is a long-nosed men's saddle, most comparable to today's Flyer model. I would love to get a shorter nosed model for this bike, and if anyone would like to trade let me know.


Chrome Raleigh Lady's Tourist

I am still just getting to know this bike and not sure what I will do with it in the immediate future. Putting it in storage was my plan, but I rode it and it feels too nice to put away just yet.


Chrome Raleigh Lady's Tourist
For now I will get the cotters replaced and see what else needs adjusting. There is a local vintage bike show coming up in August and I might take it there if the timing works out.


Chrome Raleigh Lady's Tourist

While this bicycle is rare by virtue of being unusual (I only know of two other lady's chrome DL-1s in existence - one of themhere), the late vintage and used condition don't make it especially valuable in collectors' terms. It is, however, historically significant - serving as an example of Raleigh's chrome finish and late-production DL-1 models. I can hardly believe my luck in getting my hands on one of these.


More information on chrome Raleighs can be found here. And a good source of information on DL-1s in general is the author of this blog. Also worth visiting is Velo Ulli's collection - his focus is on pre-1920s bikes and it's glorious eye candy. It's always good to know collectors whose interests are different from yours... that way they can pass those unwanted bikes they pick up onto you!

Saturday, October 25, 2008

Gunks Routes: Proctoscope (5.9+), Feast of Fools (5.10b) & No Glow (5.9)


(Photo: Below the roof on the first pitch of Feast of Fools (5.10b).)


What a difference two weeks can make.


During Labor Day weekend I felt a little rusty and out of shape, trudging up climbs in a sticky summer stupor.


But this past Sunday was like another world. The weather was absolutely perfect and I felt almost like myself again.


I drove up early from NYC and picked Gail up at her house in Gardiner. We didn't have much of a plan. In the time since Labor Day I'd made it to the gym a few times. I felt okay, certainly better than when I got back from summer vacation, but I couldn't say I was back to climbing my best. Nevertheless the night before we met up I suggested to Gail that I might be game to check out one of the Gunks 5.10's on my list, like Feast of Fools (5.10b) or even 10,000 Restless Virgins (5.10d).


It's easy to be brave in an email.


When I got to Gail's house the temperatures were still in the 40's (!) but by the time we got to the cliff and hiked up the Stairmaster it had warmed up. I was comfortable all day in just a tee shirt with no jacket. On the carriage road we could see lots of people streaming into the Trapps, but when we got to the Arrow wall we found ourselves surprisingly alone.


What a fine situation to be in: we had glorious clear weather and some of the best moderate climbs in existence right in front of us, all of them empty. We decided to warm up with a few of routes on this wall. Gail led the first pitch of Arrow (this first pitch is 5.6) and then I led our next three pitches, knocking off the upper pitches of Arrow (5.8), Annie Oh! (5.8) and Three Doves (5.8+).


The combination of cool temperatures and the white, marble-like rock of the Arrow wall was magical. Chalk was almost unnecessary.


Arrow is always a pleasure, and the bolts make it a totally mellow experience.


I was curious about Annie Oh! because I hadn't been on the climb since the scary loose block in the middle of the pitch fell out last November. I can't say its absence has changed the climb much. As I climbed the pitch I wasn't even sure where the block had fallen out from. One somewhat scary feature remains on the pitch, a flake/overlap that seems to be attached but which rings quite hollow. There is an old fixed Alien underneath it. You need to place pro underneath and climb atop this feature to do the route; if it ever comes off it could be ugly. Despite this one concern I love the second pitch of Annie Oh!; it has so many great moves on it, all the way to the very last one up a seemingly blank notch.


The top pitch of Three Doves is also fantastic. It is a step up in difficulty from Annie Oh! and it too has a strong hold on my affections. I love the delicate face moves to the roof and then the traverse right is exciting. I thought about moving left instead of right to finish through the 5.9+ ceiling of Hawkeye, just for a change, but it was only my second time on Three Doves and I was enjoying it so much I decided to carry on and finish it the regular way.


By the time we descended from Three Doves the wall had become very crowded. It seemed that every route suddenly had a party on it. (There was a leader on Annie Oh! climbing in bare feet!) We decided to return to the ground to see if Feast of Fools was available. I tried not to get my hopes up. I'd been looking to hop on Feast of Fools all year but because it has a bolted anchor atop its first pitch it always seems to have a huge group of top ropers hogging it. I assumed today would be no different, but who knew, I thought, we might get lucky.


It turned out no one was climbing Feast of Fools but there was a man at its base belaying his partner up the first pitch of Proctoscope (5.9+), around the corner. He said he was planning to lead Feast in a minute when his partner finished Proctoscope, but that if I wanted it now I could have it. His politeness overwhelmed me, so much so that I felt guilty about taking advantage.


Gail suggested I might like Proctoscope. (She'd been on it before.) I'd been curious about it, but it was not on my immediate tick list. I thought I had read that it was hard to protect. But when I looked up I could see that the man we were speaking with had several placements through the steep crux face. He had sewn it up. It looked quite safe. The climb would shortly be available. His partner appeared poised to finish up pretty soon.


I decided to give Proctoscope a try.


The first pitch is technical and challenging. The early going is easy, up a six-inch off-width that you can't protect without a Big Bro or some really big cams. But there are jugs in the off-width, so it really isn't a big deal. Once you get your first gear in, maybe twenty feet up, the pitch is very well protected from that point on. After the off-width you step left to a similarly easy chimney which leads to the business of the pitch, the steep orange face beneath a ceiling.


I really liked the steep orange face, and I did a good job on it.... until I didn't.


As of this writing there are two fixed pieces on the face, a piton right at the start, and later a fixed wire up near the ceiling, at the crux move. I clipped the piton and made the first thin, easy-does-it move upward. Then I plugged a cam in an obvious side-pull hold, being careful not to make the hold impossible to use. So far, so good. Gently stepping up again, I was already level with the fixed wire. It appeared I was one move away from a good hold, a jug up and left. If I could get up to that hold I might be done with the hard stuff. I'd just have to do a few easy moves up and left, skirting the ceiling and reaching the bolted anchor.


Only one thing stood between me and the onsight. The handholds were terrible. These are the "small, rounded holds" mentioned in Dick Williams' guidebook description for Proctoscope. I had a great foothold but I was barely holding on to a shallow crimp with my right hand. My left hand was on a sloper I considered basically useless. I was sure I'd fall if I released my right hand, so I carefully reached down with my left hand, got a draw and clipped the fixed nut. Then, feeling very tense and still gripping like mad with the right hand, I slowly clipped the rope to the draw.


Whew! Now I needed to move. I saw no good footholds, but I thought maybe I could step on this one indentation. I started to step up to grab the good shelf, but my toe slipped and whoosh, just like that, I was off. I had taken a fall on the fixed nut.


One move away from the jug. I was angry that I'd blown it. In my anger I rushed right back up there, got out of sequence and immediately fell again.


I recharged and tried to be more patient. And the third time it worked out. I didn't over-grip with the right hand, and I searched around to find a slightly better hold for the left. Once I found one I was able to bump up to the jug, and the difficulties were over.


This is a high quality pitch. I regret screwing it up. The fixed wire really helps. Placing your own gear there at the crux would increase the difficulty. It would be very tempting to just run it out to the next move.


We were planning on doing the 5.8 pitch two of Proctoscope so I stayed at the bolts and brought Gail up. When I arrived the man we'd met earlier had finished with pitch one of Feast of Fools and had his rope up on the chains for the other people in his party. And while I was standing there another pair, two young women, rapped in from a tree on the GT ledge. They were hoping to set up their rope to top rope Feast after the other party finished. When Gail arrived we had four people and three ropes on this one anchor. it was kind of a mess, but it was just another Sunday in the Gunks.


We waited while the other pair at the anchor sorted out their plans and then I led pitch two. I liked it. It is worth doing at least once. It features a fun roof problem, directly above the belay. The roof is well-protected and there is another nice move to get established above the roof. After that it has easy and not very interesting climbing going left to avoid the larger ceiling and head up to the GT Ledge.


We took a quick look at the third pitch of Proctoscope, which diagonals up the huge arching corner just left of the upper pitch of Nurse's Aid. This 5.8 pitch trends left until it reaches the top of cliff right next to Arrow. It is not recommended by the guidebook. It looked not-so-awful to us, but Gail's husband Mitch came out to meet us as we finished pitch two-- he has just begun climbing again after a lengthy battle with a wrist injury-- so we rapped down from the Arrow bolts to meet him. The Arrow wall was still packed with people, which worked out to our benefit. Janette Pazer of the famous Family Climbing group was there with some friends. They had the first pitch of Annie Oh! set up and they kindly allowed Mitch and Gail to take a run up their rope.


While Mitch and Gail were over on Annie Oh!, I staked out the base of Feast of Fools. The young women with whom we'd shared the bolted belay station were almost done with the route. By the time they cleared out, Mitch was free for me. I was all set to go. Mitch belayed me for my onsight attempt on Feast of Fools.


(Photo: Confronting the starting moves on Feast of Fools (5.10b).)


I'd been excited about this pitch for a long time. It looks intimidating, with a big roof providing the first crux and a second crux at a small overhang and steep corner above. I'd made a point of never top-roping it, hoping to "save" it for the onsight. And now the time at last had come. But as I started up I found the first few moves to be surprisingly mysterious. The sun was soon to go behind the cliff, but at this moment it was beating down on me. I felt hot, for the first time all day. I was nervous. I wondered, "do I really want to do this?"


The answer: I did, in the worst way.


After a minute I settled down and made a move up, then soon found myself beneath the first roof, which is really a big pancake flake stuck in the cliff. I had thought this wouldn't be so bad, since you don't really pull the roof but rather go around it, escaping to the right.


But the holds underneath are tiny crimps and it felt very committing to reach out to the big flake. I placed an Alien in the corner and cowered there for a bit. Then I made a reach to the right (see the photo at the top of this post), because I thought I needed to move over there before grabbing the flake. And it was strenuous to hang out there. The holds were tiny. Placing another piece there would be difficult.


I retreated back to the corner, and asked Mitch if I was going the right way. Did I need to go out there to the right?


"I think you do," he replied. "And I think when you go for it and just grab the big flake it will all make sense and you'll feel fine."


But it didn't seem like it would feel fine. It felt awkward and scary. I moved out again, placing another Alien. Then I retreated again.


Then I finally went for it and it turned out Mitch was right. As soon as I reached out and grabbed the pancake flake everything was fine. Moving right was easy, and then I was over the roof in no time. Crux number one was done with.


The second crux of Feast of Fools is famous for being protected by two old pins. As I stood at the rest stance beneath the pins I could see that it appeared one of them had been replaced. It looked brand new. I was thrilled.


But when I tried to move up and clip the pins I found it very difficult. The stance there is very steep and the holds are poor.


(Photo: At the second crux on Feast of Fools, at the pins.)


The first time I went up to the pins, I couldn't find the draws on my harness. So I climbed back down and moved my stuff around. The second time I went up, it was all I could do to hang a draw on the pin. I was afraid I'd fall if I tried to attach the draw to the rope. So I retreated to the stance again. After resting a bit more I went back up and clipped the rope. Then I retreated once again, and repeated the whole process with the second pin. I climbed up and down at least four or five times.


I am grateful that Mitch and Gail are patient people. I really made this pitch into a lengthy process. But I didn't want to blow it. I was determined.


It was finally time to fire through the moves.


When I went for it I found out I had already done the hardest bit, four or five times. Hanging on at the pins is the crux! I had the moves to the pins all worked out now, and once I reached up above the pins, there were no problems. The holds improved and in just a few moves the pitch was over. It hadn't been all that pretty but I had my onsight of Feast of Fools. It felt good.


It is a really good pitch, with two nice cruxes. It seems to me the hardest parts are not the cruxes themselves, but rather placing protection for the cruxes. And at both cruxes you can hang in there, get the gear you need, and then take a step back to rest before moving on. In this way Feast of Fools is easier than Proctoscope. There was no way I was down-climbing to rest after clipping the fixed wire at the crux on Proctoscope. I had to keep climbing or take a fall.


(Photo: Gail making it look easy while following pitch one of Feast of Fools, at the pancake flake.)


It would have been nice to do pitch two of Feast of Fools-- it is supposed to be a really good 5.10a pitch-- but we'll have to come back for that. Mitch was heading out, and the anchor above pitch one was still in heavy use from multiple parties. We didn't really want to be stuck there in a traffic jam again.


Instead we went to do No Glow (5.9). Gail wanted a nice casual lead and the first pitch is 5.4. I was happy to do the second pitch, as it is a pretty mellow 5.9 that I've led before.


(Photo: Gail in the unprotected early going of No Glow.)


I enjoyed No Glow, as usual, but just below the top I got scared when I placed my hand on a feature, not realizing it was actually a detached block. This block is just two moves from the top, a little bit to the right as you come up. It is about three feet wide, and is Texas-shaped. When I barely touched this block it shifted. I really thought it might come off. It scared the crap out of me.


(Photo: Yes, that is the block. Photo stolen from Gunks.com.)


I was also a little bit more unnerved than usual by the sickle-shaped flake/block that sits above and to the right of the crux move. Everybody yards on this block to get over the crux. But it is just sitting on a tiny shelf. When we rapped down No Glow last Sunday I took a closer look at this sickle-shaped flake/block and I realized for the first time that only its left edge is sitting on the shelf. The right side is actually quite a bit wider than the shelf on which it sits and it's just hanging there in space.


I don't want to overreact. There are many loose blocks all over the place, and these particular features on No Glow have existed there for many years. No one has died yet. But twice this year in Yosemite climbers have died after loose blocks were pulled off of popular trade routes. Just because it hasn't happened yet doesn't mean we should ignore obvious risks. I think these two features on No Glow are ticking time bombs. I'm done with that route.


If you climb it, please don't touch that block near the top. (It is easily avoided.) I think just a little shove would send it right down the cliff.


Anyway, nothing bad happened so it didn't put too much of a damper on our wonderful day. I left the Gunks feeling thrilled to have gotten a 5.10 onsight for once. It was a great start to autumn. I hope this fall will be a real sending season.

Sunday, October 19, 2008

Rated R in the Gunks: The Blackout (5.9-), Ape Call (5.8) & Raubenheimer Special (5.7)

Last Monday (Labor Day) was the third consecutive half-day of climbing in the Gunks for Gail and me. We arrived at the cliffs early and without much of a plan. We had talked about maybe doing Apoplexy (5.9) or Retribution (5.10b). But we hadn't discussed a warm-up route.


As we walked into the Trapps I suddenly thought of The Blackout (5.9-), a climb that Gail had introduced me to last year. This climb sits right in the middle of a very popular part of the cliff, near Jackie (5.5), Betty (5.3), Baby (5.6), Son of Easy O (5.8), and others. But no one is ever on it. Last year I had tried the first two pitches (which are both 5.8), combining them in one lead. I got a bit befuddled at the overhang on the traditional second pitch. I stepped up and down several times before committing to the move, getting worn out and then taking a hang during the traverse that came afterwards. I knew I could go back now and do better. And I thought it might be worth looking at the third pitch, which has a G-rated 5.9- roof crux but some allegedly R-rated climbing off the belay ledge up to the roof.


This time around I combined the first two pitches again. They are both very good. The first pitch starts with a fun bulge right off the ground and then, moving a little to the right, presents lower-angled thin face moves up to a ledge beneath the second pitch overhang and traverse. On Monday I brought my red C3 with me because I remembered that last year I found a funky sideways placement for it in a seam to protect the thin face moves.


Everything went well on the first pitch. I found the seam and the funky red C3 placement and danced up to the ledge, enjoying the climbing and feeling good. But Gail insisted that I went too far to the right. She was sure that last year I'd found a different seam, a different funky red C3 placement, and different thin face moves up to the ledge.


Was she right? Who knows? Either way there is pro for the moves and fun 5.8 climbing.


I continued straight into the traditional second pitch, without any hesitation this time around. This is in my opinion the best part of the climb. Once you pull the overhang a balancy move up and right to a pin presents the crux. Then a pumpy traverse right with good holds brings you to yet more steep climbing straight up on jugs to the belay ledge. The pro is good throughout. Save your red and yellow Camalots for the traverse, you'll be glad to have them. This is a really nice sequence. It looks very intimidating from below, but it's all there.


After Gail joined me atop pitch two I walked over to have a look at the R-rated beginning to The Blackout's third pitch. I could see why it is rated R. There is a bolt just over the lip of the overhang but no obvious pro on the face beneath the roof. Any fall before clipping the bolt would send the leader straight down to the ledge. Dick Williams says this unprotected face is 5.8.


As I looked it over, though, it appeared far easier than 5.8 to me. I decided to make a few moves up to evaluate the climbing and see if I could finagle any placements. I figured I wouldn't do anything that I couldn't reverse until I was sure about continuing.


It turned out to be really easy. Maybe I've just been climbing a lot lately and my view is skewed, but I really didn't think it was harder than 5.6 getting up to the bolt. There is this one little reach to the good hold under the roof. I placed a worthless nut over to the left before making this move. The nut immediately popped out but it didn't matter. I knew there was no way I was going to fall off the move, so I wasn't worried. Once I had the good hold in hand I clipped the bolt and it was well-protected and juggy the whole rest of the way. I thought the roof was straightforward and easier than 5.9.


I like The Blackout. The first two pitches are really nice, and different from each other. I am sure I will do them again. I'd feel comfortable going back to do the third pitch as well, but I don't know that I will bother. It just isn't interesting enough. There are much better roof pitches in the Gunks.


Once we got down to the ground I decided maybe I should take a look at another R-rated climb I'd never considered before: Ape Call (5.8).


(Photo: Gail about to make the crux slab moves on the first pitch of Ape Call (5.8).)


Ape Call is just around the corner to the left of The Blackout. The first pitch begins with an R-rated slab. The second pitch ends with a huge roof. Both pitches are 5.8. I've always been attracted to the roof but scared away by the protection rating on the slab. But after my experience on The Blackout, I thought maybe I could check out Ape Call the same way. I could take it one step at a time, not doing anything irreversible, and just climb back down if I thought it was too risky.


It turns out the first moves are no big deal. You quickly find yourself at a stance just a couple of moves from the top of the slab. At just above waist level is a small horizontal seam, with two narrow pockets that take tiny gear. I fiddled with these pockets for a while and got a black Alien to the left, and a purple C3 to the right. I think I got them both well set. I gave these cams some hard tugs, and while there is only so much you can tell from this kind of gear testing, they didn't budge. I thought they were good.


(Photo: Bomber, dude! The crux gear on Ape Call (5.8).)


Then I evaluated the move. Above me was an obvious hold. I figured that if this hold was positive, I could make the one step up and over pretty easily and then place better gear above the lip of the slab. If I reached up and didn't like it, I could still step down and bail.


I stepped up and tested it once, and wasn't sure I liked it, so I stepped down.


Then I stepped up and tried it again and it felt really good. That was all I needed. One step up, plus an easy-does-it step to the right, and I was in good shape. I could reach up and place a perfect cam in the corner above the slab.


(Photo: Gail attacking the huge roof on the traditional pitch two of Ape Call (5.8).)


I really enjoyed the slab. And the rest of Ape Call is better than good-- it is awesome. I ran the two pitches together in one. The remainder of the traditional pitch one has some steep moves up the corner above the slab. Then mellow climbing takes you further up the corner system to the roof. Once beneath the overhang you have to move left to get the good handholds below the lip of the roof. Here you should be careful, because there are several loose blocks that are covered in chalk along the way. Negotiate the traverse left, and then the fun really begins. Move back right, getting fully horizontal under the big roof, grab the jugs in the notch and go!


Ape Call is a great route. It has one of the best 5.8 roofs in the Gunks. And if I am right about the gear then I don't think the start is really R-rated. I would lead it again.


Having done these two R-rated routes, I just had to check out Raubenheimer Special (5.7), another R-rated climb that is in the same area, between Ape Call and The Blackout. I had to do it. It was sitting right there. I'd never been on it before, but Gail had led it and she said it was no big deal. How could I not complete the R-rated trilogy?


Raubenheimer's turned out to be the scariest route of the three, in my opinion. It is a clean route, with good low-angled climbing up an arete and face. But the crux thin move, about 25 feet up, comes above a ledge you will hit if you fail. There really isn't anything much you can do about it. I worked a nut into a shallow placement in a seam to the right, and maybe this nut was good. But the actual climbing is a ways over to the left at the arete, and if you blow the move I don't think the nut will keep you from an ankle-tweaker of a fall. And after stepping up at the crux you need to place a piece in the horizontal over your head from a rather fragile stance. The climbing is rated just 5.7, but I felt I was in much more jeopardy on this route than on the other two. I felt the moves were less secure, less certain. I'm not sorry I did it once but I don't know if I will ever go back.


In writing this post I don't want to encourage you to do something stupid. Please don't go climb one of these routes just because of whatever I may say about them. You have to make your own judgment about the risks.


Really the key insight I gained from climbing these routes is that the decision to climb an R-rated route involves the same sort of thinking that governs every other step you take as a trad leader.


You don't protect every move when you lead, even when the opportunities are there. You need to conserve gear and slings. With every step as a leader you evaluate whether you need to place some protection, or whether you can go a little further. The distance to your last pro figures into the equation, of course, but so too does the difficulty of the terrain. If you're sure you are not going to fall you will be much more inclined to keep running it out a little longer. And so if you are climbing a route with a 5.9 crux, for example, you are going to be making sure you protect the 5.9 moves. And you will be less inclined to place pro during the stretches of 5.6 or 5.7 between the cruxes. You will enter R-rated territory frequently, by choice, when the climbing is beneath your limit. You have to, or you will run out of gear.


The analysis when negotiating an R-rated route is thus similar to any G or PG route. You have to ask yourself with every move whether you are confident you can continue without pro. The only real difference is that if the answer is no, you don't have the option to place a piece. You have to be prepared either to make the move and take a risk, or to bail. If you find yourself unable to do either one, you've made a big mistake.


After I finished Ape Call, Gail asked me how I was feeling while leading the slab. I had to say I just felt good. I wondered aloud about whether courting danger added to the experience, or even represented the heart of the experience of climbing. I'm sure for some people it does.


I have never thought that risking injury was at the core of climbing for me. But it can be hard to know for sure. I like to push my limits. And I surely feed off of the adrenaline rush I get from powering through a tough sequence. If I am, either consciously or unconsciously, flirting with danger becauseit gives me an even bigger rush, then I think I am in an unhealthy place and need to reevaluate what I am doing.


But I like to think I am not in such a place. I enjoyed The Blackout and Ape Call because I evaluated them carefully and continued with the climbing when I was sure it would be okay. I solved both puzzles and felt satisfied physically and intellectually. On Raubenheimer Special, by contrast, when I felt for a fleeting moment that maybe-- just maybe-- I was taking too big a risk, it didn't give me a rush or make me feel good. It actually made me feel a little sick. It was not a feeling I wanted more of.


Labor Day weekend ended my summer with a bang. I hope to get in a few more 5.10 leads before the end of . The autumn,aka Gunkssending season, will soon be upon us. Even if I don't succeed on any new 5.10's, I feel like I've had some good progress this year. The 5.9's all feel pretty good and occasionally I hit a 5.10 just right. My climbing has improved a lot, I think, and I hope to stay healthy through the fall and winter so I can again take it to the next level.

Saturday, October 18, 2008

The Starter Bike

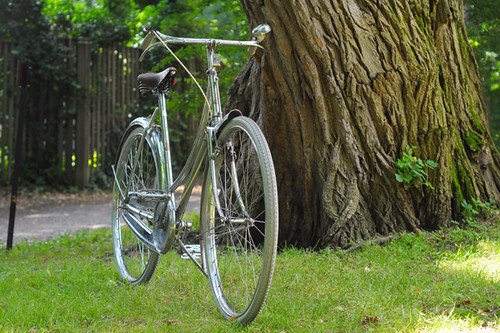
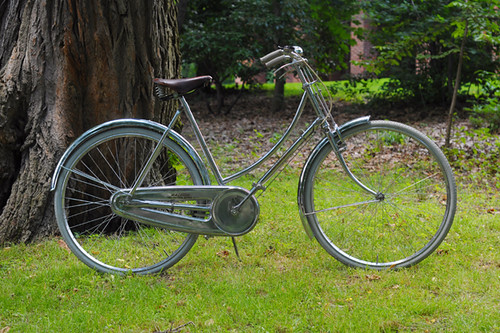
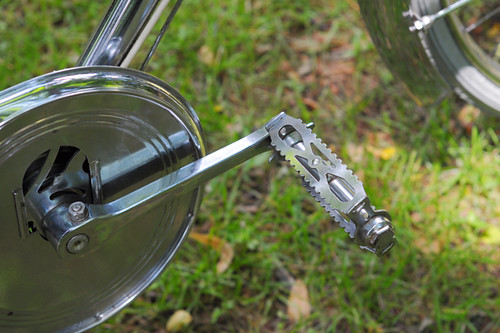
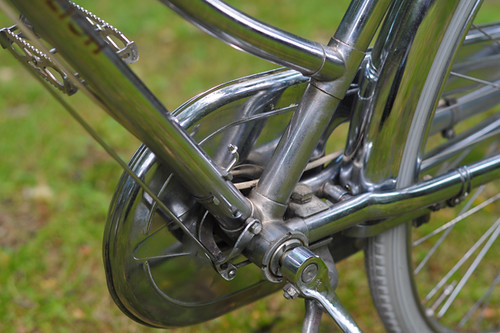
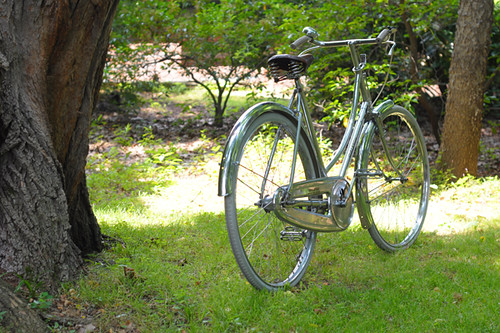
Judging by my own experience and by those reported by other fledgling transportation cyclists, the phenomenon of the Starter Bike is fairly common. The Starter Bike gets acquired when the cyclist is just starting out, and is then replaced - usually between a couple of months and a year later - by a different bicycle that suits the rider better.


Starter bikes can fall into a number of categories. Some start with an old bike that a friend or family member gives them, then buys a nicer one after figuring out what kind they actually want (or after the one they've been given falls apart). Others will buy a second-hand bicycle and will later upgrade in the same manner.


Then there is the "budget bike." New cyclists are often reluctant to spend too much money on a new bike, and $500 seems to be a typical budget for those just starting out. So they will purchase a new bike in this price range, but will soon be dissatisfied with the quality. They will then replace it with a higher quality make and model later.


Some bicycles end up replaced because they are the wrong kind of bike for the cyclist. A novice might love the idea of the Dutch Omafiets, but will discover that they just can't ride it in their hilly town. Alternatively, a beginner may start out commuting on a roadbike based on a bike shop's recommendation, but will find it uncomfortable.


Even among seemingly similar bicycles there are differences in handling that may not be apparent at the time of purchase. A perfectly good bicycle of brand X is often sold and replaced with an equally good (and visually similar!) bicycle of Brand Y after just several months of ownership, because the latter better suits the cyclist's ride quality preferences.


All in all, I would say the majority of American transportation cyclists I've spoken to who have been at it for as little as a year, are not riding the same bike now as they did when they first started. And to me this is kind of interesting. Does it mean that novice cyclists would benefit from educating themselves better before making the initial purchase? At one point I thought so, but I no longer do. There are plenty of stories showing that you could be extremely well informed and still buy a bike that is ultimately not right for you.


Another conclusion that is tempting to draw, is that since chances are your first bike will be replaced within a year anyway, buy a cheap one while you hone your preferences. But one thing to consider here is that a low quality bike can discourage cycling entirely. Typical scenario: things start to rattle or go wrong with the bike, and a novice just stops riding. Or, the bike feels extremely uncomfortable or inefficient, and the cyclist decides that this is characteristic of bikes in general. A higher quality bike, even if it is not right for the person in the long run, is more likely to inspire a lasting interest in cycling.


Finally, there is the simple fact that our preferences change over time. Sometimes this has to do with experience. There are bicycles that feel great to a beginner, because they are exceptionally stable and easy to control for those who have not been on a bike in a while. But as the cyclist grows more confident and picks up bike handling skills, the same bicycle can begin to feel limiting due to a lack in speed or maneuverability. But changing preferences need not be a matter of skill - sometimes cyclists just feel like a change from what they were initially attracted to. It seems that with transportation bicycles, there is really no way to know where on the spectrum you will settle. The Starter Bike phenomenon may just be part of the course.

Friday, October 17, 2008

A Most Excellent Adventure :: Sawyer Glacier

Friday, August 27th - - As we maneuvered around one of several outcroppings, Sawyer Glacier came into view.

I was awestruck by its size and intensity of color, and we were still well over a mile away!

A zoomed-in view of Sawyer Glacier.
As we moved in closer we began to realize just how big this thing was. And we were all amazed by the amount of ice floating in the water.

Slowly and gradually we moved in but the closest we got was 5/8 of a mile away. Captain Steve said that he normally gets to within a quarter mile (as he did yesterday) but there usually isn't so much ice. He went on to say that there had been several very large “events” (calving) yesterday, which is why the ice was so thick.

A close-up of a portion of the face of the glacier. Note that the upper portion, or second tier level, is now hidden from our view.

Of course, calving was what everyone wanted to see - and hear! Me too!
But I was also enthralled by all of the ice that completely surrounded the boat. The ice was constantly on the move. Every time there was an event there was also a surge in the movement of the ice. When all was quiet you could hear the ice moving – each piece scraping against the other and making a crackling, tinkling sound.

It wasn't a solid mass of ice but was made up of pieces of all different sizes.
When we first came into view of the glacier, Steve had told us to look for the seals laying on the ice. He had been in contact with two Rangers who were perched on the side of a cliff to the right of the glacier. Their task was to count the seals and at the time we arrived they had tallied more than 1,000 of them! They were everywhere, generally close to the perimeter of the cove.

There wasn't a lot of movement on their part. One would occasionally lift up its head and look around but mostly they were just taking it easy.

The seals didn't seem to be bothered one bit when ice fell off of the glacier. They just rolled with the flow.

There was quite a bit of activity with the glacier. This was a fairly large event. You can see ice still cascading down while the spray from the big chunk that fell flies up in the air. We stayed at Sawyer Glacier for nearly two hours and by the end of that time, I was freezing! But I would have stayed longer if I could. It was impressive, exciting, exhilarating. Quite simply, fantastic!

Before we left, however, Captain Steve noticed a seal not too far away and maneuvered the boat closer to it. The seal lifted its head and looked at us. It made no attempt to leave its apparently comfortable perch on that bit of ice.

And with that sweet look, we departed Sawyer Glacier, exuberant and more than satisfied with the experiences of the day. But wait! There's more...

Muir Snowfield and Camp Muir

Muir Snowfield and Camp Muir on May 21 2006

There is great coverage all the way up. Most people are still using the winter trail up to Pan Point. Beyond that the trail is very well wanded all the way to muir. There has been a lot of traffic on it and there is a great boot pack all the way to Muir. Even though it is pretty soft if people stay in the boot track they only end up post-holing in a few places. The skiing on the snowfield is excellent right now. Yesterday we got a dusting of snow and had perfect corn underneath that above 8500'. Today all of that froze and the snow was rock hard down to about 8500', but below that it was a wonderful 3" of soft wet snow on top of a frozen base so it was fun fast skiing. The chute down onto the Nisqually was stellar and fairly easy to traverse back up to the main trails at the glacier vista overlook (we did not have to put our skins back on). There are also two really fun kickers just below glacier vista :)

All in all its in pretty darn good shape for skiing. I would say folks don't need crampons unless they plan to travel really early or really late in the day. Skis or a board will make it lots of fun and I don't think snowshoes are that helpful since the boot pack is so well traveled.


The Camp Muir Public Shelter was significantly refurbished in 2005. The new interior design increases the usable space markedly. The bunks are organized to accommodate more people, as is the storage and cooking space. So far, the comments have been very positive; in particular, many expressed appreciation of the increased lighting.

If you plan to stay in the public shelter, please keep it clean! Always secure the door when leaving, as a small crack will fill the hut with snow during storms. Never leave anything (food, gas, and gear.) Also, overnight travelers should consider brining own shelter in case they’re unable to make it to Camp Muir. At this time, the public shelter and toilet are accessible.

Please do your part to keep the mountain clean. Petrified feces and toilet paper flags strewn along the climbing routes and crusted on rocks near bivi sites are unsightly and unsanitary. Remember that everyone on the mountain melts snow for drinking water. All parties are required to pack their solid human waste off the mountain when not using the toilets at Camp Muir and Camp Schurman. Blue bags are available with climbing permits. Blue bags may be deposited in the large black barrels at Camp Muir or at Paradise. The barrel at Paradise is located in the restroom tunnel next to the men’s room.

Sunday, October 12, 2008

ANT Headbadge in the Making

Making an ANT Headbadge

Visiting ANTyesterday, I got to see something very cool: The making of a headbadge from start to finish. The ANTheadbadgelooks like a piece of antique jewelry - resembling an oxidised copper brooch. I've been wondering how Mike Flanigan makes them, and now I know:


Making an ANT Headbadge
Turns out the headbadges are brass, not copper. While initially Mike made them by hand, for years now he has been getting them laser-cut in batches. But on this occasion he needed a headbadge for a bike with a short headtube, so he made a smaller one from scratch, starting with a blank plaque.


Making an ANT Headbadge
The headtube was not only small, but had decorative lugwork around the edges, limiting the space for the badge quite a bit.To start with, Mike measured the available space and cut down one of the blanks to size with a saw.


Making an ANT Headbadge
Using one of the laser-cut badges as a model, he then drew the design on the smaller blank freehand in black marker. Because of the difference in scale, the ant on the smaller badge came out slightly differently - chubbier and shorter, with a rounded head. We decided it was a juvenile ant.


Making an ANT Headbadge
Not sure whether this is obvious, but the rendering of the insect actually spells "ANT" - the head being the "A," the torso the "N" and the bottom the "T." It's a clever logo.


Making an ANT Headbadge

Using a variety of files and an awl, Mike carved out the ant and "distressed" the plaque.


Making an ANT Headbadge

The remaining traces of marker were then removed and the surface smoothed down.


Making an ANT Headbadge

Once the headbadge was ready, the patina was applied. This is the stuff that gives the headbadge the look of oxidised copper.


Making an ANT Headbadge

This is a liquid patina goes on blue, but turns rusty-green as it air-dries. The process can be speeded up by putting the patina-covered headbadge in a plastic bag for a few minutes.


Making an ANT Headbadge

As the "oxidation" completed, Mike attached the badge to the headtube and it was done. The process took about 30 minutes total and was pretty exciting to watch. I don't think that many headbadges are carved out freehand anymore, and doing it this way gives them a distinctly hand-made look. A big thank you to Mike for letting me observe and share the process!

Thursday, October 9, 2008

Navigating the World of Clipless Pedals


Last summer I wrote about trying to ride clipless and failing. Unfortunately, not much has changed since then. For background, I do ride my roadbike with foot retention: I use Power Grips, adjusted as snugly as possible. They bind my feet to the pedals effectively while still being extremely easy to get out of. Sure, they don't exactly look "pro," but they get the job done and anyone who thinks otherwise has probably never tried them. Still, it bothers me that I just can't master riding clipless after all this time, while others have no trouble with this skill at all. This year I was determined to get to the bottom of what makes it so hard for me.


My first step was to start from scratch. Last year, the Co-Habitant gave me his old clipless pedals (Shimano M520) and I used those by default. I got as far as being able to ride around the block gingerly, but ultimately just wasn't comfortable with it. Later more than a couple of women told me that they hate these pedals and cannot use them either, and that what I should really do is go to a bike shop and try as many different pedals as possible. I didn't know you could do that, but apparently some bike shops offer this service. Since I spend a lot of time at the Ride Studio Cafe as it is, I arranged with them for a fitting. They have a trainer in the back room where you can set up either your own bike or one of their demo bikes, and they have a variety of clipless shoes and pedals to try.


To ride clipless, you have to buy a set of pedals, which are sold with cleats, and a pair of compatible shoes. The cleats that are purchased with the pedals are then attached to the shoes. There are many brands of these pedal/cleat systems, and they are generally classified into road (SPD-SL) vs mountain (SPD) - a little misleading, since in practice both are frequently used by roadcyclists. The mountain bike system (left) features small cleats with 2 attachment points. Notice also that on the shoe, the part where the cleat goes is recessed, so that when off the bike you walk on the sole and not on the cleat itself. The road system (right) features larger cleats with 3 (or 4) attachment points. And the shoe is not recessed, so that when off the bike you actually walk on the cleat (this is why roadies make those click-clacking noises on pavement). As it is explained to me, the benefit of the road system is that more of your foot is attached to the pedal. The benefit ofthemountain system is that it is easier to walk off the bike.


Popular road-compatible systems include Look, Shimano, Time and Speedplay, all shown here. The former 3 are near-identical, but the Speedplays (the smaller pedal on top) are a little different in shape and attachment style (also they are double-sided, whereas the other road pedals are one-sided). I did not bother trying these, because nearly everyone I know who uses them seems to have problems. But I tried the Shimano and Look SPD-SL, and I liked them both. The clipping mechanism felt very different than that of the (SPD) Shimano M520s I was practicing with last year. For me at least, it felt much easier to clip and unclip with the road pedals; the mechanism did not feel clunky or death-grippy. With the SPD cleats last year, even on the weakest setting I felt as if I were stomping on the pedal with all my might to clip in and jerking the bike sideways in order to unclip. With the road system, the mechanism on the pedal felt as if it grabbed the cleat without much effort on my part, and I could also unclip fairly easily. On the downside, I found the road shoes slippery to walk in, which made me nervous. A number of people I ride with discouraged me from going with the road system for this very reason.


Having already tried the typical Shimano SPDs and determined that I did not like them as much as the SPD-SL, the one system left to try was Crank Brothers. This is technically a mountain bike system, and the cleat looks very similar to SPD cleats. However, the pedals are 4-sided and use a different mechanism. I had hope for these pedals, because those who use them report that they are very easy to clip in and out of compared to the other mountain systems. I tried them, and I agree. The mechanism engages and releases very easily, and I know that I will be able to practice with these without the "what if I can't unclip?!" anxiety. The model pictured here is the Egg Beaters, but I ordered the Candys - which are the same, except with a platform. I wanted the platform version, because I do not like the feel of tiny pedals and want more support for my foot. I think the platform will also make it easier for my foot to locate the binding mechanism, before that part becomes intuitive.


It is yet to be determined whether I'll be able to master clipless, but I have a feeling that if I can do it at all then I'll be able to do it with these Crank Brothers. My biggest problem so far has been fear over the effort of unclipping, which should no longer be an issue with these. I will keep you posted on future progress or lack thereof. But for any beginners reading this, I encourage you to visit a bike shop that specialises in this stuff and talk to them, try different pedal/cleat combinations and see how they feel - as opposed to struggling with a system just because a spouse or a friend uses it.