Sunday, October 30, 2011

Black and White Photos


Decided that all this snow was right for taking some black and white photos. Sometimes I just prefer the old fashioned look.


Saturday, October 29, 2011

Big Bend Revisited :: Chisos Basin

Thursday, February 28th - - It was about 180 miles from Seminole Canyon State Park to the northern entrance of Big Bend National Park. At 10:30 when I finally left Seminole Canyon, the temperature was 57 degrees with a few clouds, lots of blue skies and sunshine.


Once you get to the entrance of Big Bend, it is another 30 miles to the visitor center at Panther Junction, then another 24 miles to the Rio Grande Village area in the eastern side of the park. The road to Rio Grande Village is mostly downhill - it takes you into the "lower" portion of the park - and the temperature went from a cool 60 degrees to a much warmer 69. Yeah, that was nice!


I picked out my campsite, which was to be "home" for the next four nights. The campground was not full by any means and there were plenty of sites to choose from whether you wanted one "out in the open" or more secluded along the southern section (as I did). As usual in most National Parks there are no hookups for electricity or water in the "main" campground. However, Big Bend does have an "RV" area with hookups but it is pretty much a parking lot.


Friday, March 1st - - It got quite cold during the night, as expected, and it sure would have been nice to have a little heater to take the chill out of the air. Instead, I just stayed in the sleeping bag a little longer than usual...


It was still chilly when I finally got up, but it was quite comfortable sitting in the sunshine and eating my breakfast. I decided to drive up to the Chisos Basin area, stopping along the way for some photos...


Looking to the West, from about 5 miles east of the Panther Junction visitors center.


Somewhere along the lower portion of the road to Chisos Basin. It's about 8 miles once you turn off the main road to Chisos Basin. The road goes uphill, winding its way through the mountains, gaining several thousand feet in elevation, and making several hairpin turns. The road is not recommended for vehicles pulling trailers longer than 20 feet or for RVs more than 24 feet long.


I don't think there have been any recent bear sightings, but mountain lions were seen in several areas earlier in February. One was even sighted along the Window View Trail not far from the visitors center and the Chisos Lodge.


Once you get to the highest point along the highway, you then start going down into the basin area. Hidden out of view are the campground and Chisos Mountain Lodge.


Traveling a little further along the road, the campground area comes into view. I stayed there for five nights on my visit in February ... The vehicles look so tiny compared to the mountains surrounding them.


The view through the "window" from the Window View Trail near the visitor center and Chisos Mountain Lodge.


My visit this year would be very different than it was in .., and shorter. My legs can't handle the long hikes as well as they did three years ago and I am pitifully out of shape. Nevertheless, the visit this year was very enjoyable and more relaxing, and of course, there will be more posts/photos to come. Below is a list of the posts from the .. visit I thought you might enjoy reading again (or perhaps, for the first time) - I was far more adventurous then!


  • February 20, .. - Chisos Basin (posted March 10th)

  • February 21, .. - Lost Mine Trail (posted March 11th)

  • February 22, .. - Laguna Meadows Trail (posted March 12th)

  • February 23, .. - Snow in the Chisos (posted March 13th)

  • February 24, .. - The Window Trail (posted March 14th)

  • February 25, .. - Rio Grande Village (posted March 15th)

  • February 26, .. - Down by the River (posted March 16th)

  • February 27, .. - Hot Springs Trail (posted March 17th)

  • March 1 & 2, .. - Cerro Castellan (posted March 19th)

  • March 1 & 2, .. - Castolon Homesteads (posted March 20th)

  • March 1 & 2, .. - Santa Elena Canyon (posted March 21st)


Monday, October 24, 2011

Urge for Spring


In going through some of my photos I found this shot of some cherry blossoms I took last year. My urge for spring is getting stronger every day.

Sunday, October 23, 2011

Mating Damselflies, Swamp River


I paddled 13 miles on Swamp River yesterday and saw several critters but the highlight of the day was seeing all of the damselflies in the grasses and on the lily pads along the edge of the river. They are so small, most people probably wouldn’t even notice them. These little guys are only about an inch and a half long. Once you notice them, it’s hard to take your eyes off them (they are also quite hard to photograph, since they usually don’t sit still for very long). Adding to the difficulty was the wind. It was quite hard to capture these critters when the grasses were blowing around so much!

Gunks Routes: Yellow Ridge (5.7)


(Photo: coming around to the stance beneath the off-width on the first pitch of Yellow Ridge.)


Often described as the best 5.7 in the Gunks, Yellow Ridge delivers a classic Fritz Weissner old-school sort of experience. An intimidating 5.7 off-width crack looms about 10 to 15 feet off the ground. The first belay traditionally follows directly above, and then the second pitch follows a path-of-least resistance 5.5 traverse up and left to a decent ledge. Then in the final pitch comes the glory: a thin traverse left to an arete and an improbable 5.6 haul through great jugs to the top.


The first decision confronting the climber is how to get to the off-width. Guidebooks have differed as to which approach is the original route; one can climb up to the off-width from the left, from the right, or directly up a nose from below. Dick Williams' latest guidebook suggests the approach from the right. This approach has the advantage of being the only start with good protection. When I led the pitch in March, this is the way I went, and I thought it was a bit strenuous for 5.7, but very secure and fun. The climb begins up a left-facing corner and then traverses under a low roof to the nose beneath the off-width. A good undercling crack provides great pro and hands for the traverse. The feet are quite smeary, however, and this part of the pitch really gets the pulse going, quite close to the ground. Then it's a fun maneuver rocking over the top of the nose to the stance beneath the off-width.


The off-width itself is kind of a letdown. I doubt even Fritz grunted up the thing. There are enough little edges around it that there is no need to use the wide crack to advance. I brought up a couple big cams just to see if they'd be useful, and it turned out they were totally unnecessary. I placed a gray #4 Camalot just above the piton at the base of the off-width. It wouldn't fit any higher. I suppose it had value in backing up the pin, but a #3 would have gone in almost as high. Then about half-way up the crack I placed the purple #5 Camalot, but right there a good horizontal also appears which takes a variety of different cam sizes. So leave the big gear in your bag, there's no point in bringing it for Yellow Ridge.


Traditionally there is a belay at the ledge above the off-width. I wasn't experiencing any drag, even though I placed gear both before and during the traverse beneath the roof at the start of the pitch, so I elected to continue through the easy 5.5 moves up and left to the final belay ledge. Here my partner Adrian took over for the 5.6 money pitch. I had been through this area before, but never from this direction. Instead I had previously done the final portion of Yellow Ridge by approaching it from the other side, through a link-up climb called Basking Ridge, which ascends the excellent 5.7 first pitch of Baskerville Terrace, then moves to the right and goes up a cool rising traverse around a corner to the right to join Yellow Ridge at the arete below the overhangs.


When I climbed Basking Ridge last year and came around the corner to join Yellow Ridge at the arete, I looked to the right and thought the Yellow Ridge traverse looked a little thin and intimidating. This year, Adrian made it look very easy, then moved up, clipping the pins that are the only pro for a while through the arete section. Then he started to move out of sight, but he paused beneath the overhangs. As I've mentioned before, Adrian is a recent transplant to the Gunks. He is used to climbing out in Squamish, where the cracks are vertical and the roofs don't tend to go at easy grades.


"Do you know where I'm supposed to go?" he asked. "There's nothing up there that looks like 5.6 to me."


"Straight up!" I said.


"Really?" I think I see a pin off to the left through this filthy gully..."


"NO! No! Straight up, man. You'll see, it's nothing but jugs and awesomeness."


"I trust you, but it doesn't look that way..."


"I've done it before, really, I'm quite sure about this."


"Okay, okay."


So Adrian headed upward, and after a short period of silence, he let out a great whoop, and yelled:


"5.6 in the Gunks!!"


And that's the magic, really, of a climb like Yellow Ridge, and of so much climbing in the Gunks. It looks like it's going to be absurdly hard, and it is actually quite steep, but the holds are so great it really is fair to call it a 5.6. Powering through these overhangs is a joy, a special kind of thrill you don't get anywhere else from such moderate climbing.


When I followed the final pitch I thought the traverse to the arete was nice but no big deal. A couple of delicate face moves and it was over. Having done the whole climb I had to conclude that Yellow Ridge is not the best 5.7 in the Gunks. Aside from a few nice moves at the bottom, the climb is just okay until the wonderful, outstanding final overhangs. I think that Basking Ridge, on the other hand, is a legitimate contender for the "Best 5.7" crown. Starting with the technical, challenging thin corner of Baskerville Terrace, it then offers an airy, rising traverse to the Yellow Ridge arete that is more exciting than traversing in from the other direction. You also arrive on the arete a little lower than you do when you come in from Yellow Ridge, which adds a bit more exposure as you move up to the pins and then the final overhangs.


And I have another idea for what might be the very best, and most direct, link-up that leads to the last pitch of Yellow Ridge. It would start with the classic first pitch of Fat Stick (5.8), which I've never done, and then climb the second pitch of Fat Stick Direct (5.10(b)), which I've also never done. This would place you just to the right of the belay for the final pitch of Yellow Ridge, which you would then do instead of the R-rated third pitch of Fat Stick Direct. This link-up would produce an awesome moderate climb with a well-protected 5.10 roof crux in the middle. If I get the guts to break into 5.10 this year, I'll definitely give it a try and report back!

Friday, October 21, 2011

Where the Buffalo Roam...

Sure, they are “domesticated” Buffalo, being raised on a ranch, but they still roam...

Their manners and actions reminded me of once, a long time ago, when I stopped to photograph some cows back in Indiana. Apparently cows and buffalo are both curious creatures; they kept coming closer and closer.

So close that I could have reached out and touched them...
Momma was very protective of her calf.
Photos taken in south-central Montana on July 22, ..

Wednesday, October 19, 2011

Clay Jug


This is probably my favorite of all the photos I took on mine and my friends trip to Old Town. It was sitting in a back corner of an outdoor coffee shop area.

Tuesday, October 18, 2011

The People's Choice on shells!


A couple of weeks ago I had asked for your favorite shells and why.  Here is some of what I

got. Please bare with the email cut and pastes. No clue how to fix that. But the feedback is great. Thanks to all who took the time and contributed. Enjoy!


For ice climbing in Colorado, I am pretty happy with this:

1 - Eddy Bauer Accelerant jacket layered over a thin base layer. It
is surprisingly warm, very lightweight, and has an excellent athletic
fit with long arms. I sometimes use the thumbholes on the sleeves.
This jacket solves the annoying problem of hood wars. I like one hood
under the helmet (this jacket provides that) and one hood over the
helmet (the next jacket provides that). For fast moving in coldish
conditions it breathes adequately and seems reasonably durable. The
Arcteryx equivalent of the Accelerant is probably just as good, but
more expensive and I do tend to trash these little lightweight
jackets. Also I really like the thumbholes and lightweight hood of
the Accelerant.
2 - When it gets colder, or for belays, I add a Wild Things lightly
insulated jacket. That one is compact enough I am happy wearing it
while climbing. It breathes ok, is windproof and very water resistant
and durable. It has a good over the helmet hood. It could be warmer
for belays, but I don't like carrying a garment just for belays. When
I am instructing and standing around a lot I take an old OR synthetic
puffy instead which is heavier, but toasty.
3 - Whenever I can get my hands on one of the waterproof/breathable
non-woven Dyneema jackets I'll throw one in the pack for hideous
conditions.

Bob Culp


Hi.


I'm Matti from Finland and I'm pretty active all round climber, skier and hiker. And
with ski I mean telemark, cross country and Nordic touring. The weather is normally
pretty severe here in northern Finland, Sweden and Norway where I do most of my
winter activities. -20C is pretty standard day during the Jan - Mar. My coldest ice
climbing week had average of -32C. I'm not very good at ice stuff, but I can lead WI
4-5 so it serves as "feelgood" activity during winter where I mostly climb
multipitch WI3 in Norway and Sweden. My main focus is in summer stuff (7c+ in both
sport and boulder and (well protected) trad up to ~7a). Anyho I get around 200
outdoor days (I also include after work stuff) per year.

My absolutely favourite is old 'Ryx Gamma MX hoody(polartec version). It works in
everything (as long as the weather is below zero degrees) and awesomely. Put thick
merino underwear under it and perhaps light down west (like Patagucci down west) if
it's real cold. You stay warm and dry even if you get totally soaked during climb
and it's -20C. First the stuff might freeze, but in few moments of high wattage
action and you are dry again. And unlike real hardshell the shit really breaths. You
can see the difference as huge cloud of steam :). This is very important fe in
Nordic touring, cross country skiing or when I'm skinning as you sweat up to 12
hours a day.

I must say that I sweat like a pig, but So Far (tm) I haven't tried a HS material
that would actually keep me dry even in dry if I'm active. And in really cold the
water just stays inside the HS jacket. Also they tend to rip.

Also the stretch cuffs are pretty much second best feature in the jacket. Combine
them with gloves (like those stupendously expensive 'Ryx leather gloves) you can
tuck in and you've got seal that's totally water and snow proof. No matter what you
do it doesn't open up. Also it' really robust. Velcros just break down. I know it's
probably not so much of an problem with you as you guys change to new apparel more
often than I change my underwear, but with us regular joe's we really appreciate
garment that lasts. I've gotten 7 years of active use out of my Gamma and now it's
totally destroyed.

Also the cut is fantastic. I love just how the garment fits just so and doesn't
leave any extra material to block my view to harness. Also at the same time it
allows good range of motion.

Regarding most of the stuff above I'm in a bit of a dilemma. New Gamma MX doesn't
just float my boat way old one did. Cut is more average consumer orientated,
material isn't as wind resistant (old one was spot on for my tastes) and seems
somehow less sturdy. This brings the problem that there really isn't any other
jackets with:
1. Good cut and quality
2. same cuffs
3. Powershield
4. Good hood
5. Wouldn't mind if it also looked good.

Ideas?

We've got custom shop here in my hometown (Oulu) that makes tailored outdoot gear
(www.shelby.fi<http://www.shelby.fi>), but polartec powershield isn't available
unless one gets few hundreds of meters of it -> they do not stock it.

-Matti Sillanpää-


Bruno
Schull
said...
My choice for a softshell jacket is the Marmot tempo hoody. This is an
inexpensive non-lined softshel. Mot importantly, it fits me really well in XL. I
am tall with long arms, and I find it extremely difficult to find a jacket that
works for climbing. The Tempo has a long back and arms, and is one of the very
few jackets that I can tuck under a harness, and will not pull out when I raise
my arms over my head. The hood works well over a helmet. The cuff closures are
simple and effective. The pockets are located above the harness and out of the
way of pack straps. No pit zips. Simple and clean. It is not as waterproof nor
as wind resistant as some of the lined shells, but it makes up for that by being
extremely breathable; the inside stays dry and your body stays warm. Great,
simple, effective, inexpensive jacket. Also comes in some offensive florescent
colors for Dane! All the best.


Daniel
Harro
said...


Arcteryx Gamma SL hybrid is a nice jacket as well as being truly light weight
at 13 oz.


http://arcteryx.com/Product.aspx?EN/Mens/Gamma-SL-Hybrid-Hoody

I
personally think "uninsulated shells" should clock in well under 14 ounces,
anything heavier is too much. My Alpha LT hardshell is 13.5 oz.


Blogger brian said...

Great discussion as always Dane. What about the Acto MX Hoody? I switched
last year after climbing in Gamma MX Hoody's and the first gen of the Venta MX
for many years. I find the Acto breathes much better than any other softshell,
and when it gets real nippy, i throw the Atom LT over it. No complaints other
than the "trim fit" versus the "athletic fit" on the mx line.


Andy said...


Hey Dane - totally second the comment by Brian about the Acto MX Hoody. I
agree it's perhaps best to call it a hardfleece rather than a soft shell. But in
terms of the fabrics properties and performance I find it similar to something
like the Rab Scimitar you reviewed above. But better. Very breathable, very
water resistant, amazingly durable, though not very wind resistant. Not too
different from most stretch woven fabrics though I reckon. I too was a long time
Gamma MX Hoody user, I find the Acto way better all things considered and it's
the best hardfleece/soft shell I've ever used.


Ian said...


In my mind the best hardshell is the one that never leaves my backpack. I
have yet to wear a hardshell I actually liked. I have a very lightweight Rab
shell but I've only ever worn it once.


First Place for me: Patagonia Supercell Jacket. Gore-tex paclite material,

weighs 13.5 oz. Great fit (for me - 5' 11'' 180 pounds size large). As

breathable as traditional hard shell gore tex gets in my opinion. Super

minimal design and great hood. This is my new go to shell for just about

any adventure in the mountains but especially for ice climbing. My favorite

shell is the one that stays in my pack until I really need it. In this

case, the supercell performs great, packs up into its hood, provides great

waterproof protection and breaths pretty damn well (vents still needed when

really working hard).


Zach Lees


Until last winter I was

using some lighweight hardshells from Mountain Hardwear and TNF. Neither

of them were really Alpine specific. The MH was too long and always

interfered with ropes and harness access. The TNF jacket was a nice

shorter cut and very packable, but more geared for warmer weather and I

never fully trusted its ability to keep me warm and dry in nasty

conditions. Last winter my goal became to find a high quality, high-value

alpine shell with Goretex Proshell, or equivalent. I ended up going with

the Outdoor Research Mentor

http://www.outdoorresearch.com/en/or-gear/jackets/mens-mentor-jacket.html

I think the suggested retail price is very fair for a pro shell jacket, and

OR gear always seems to end up on sale or clearance. I scored my Mentor

for about half off. While I have yet to test it in any real nasty weather,

my initial impressions are strong. Seems to be of high quality

construction, and fit and style suit me well. It also feels pretty bomber

and will hold up to the New England granite and whatever else I put it

through. Here is a picture of me on Mt. Osceola (New Hampshire) last

winter. I think OR will be a good source of high-value outerwear for the

next few years as its clothing line expands ahead of its reputation. I

think they have always been well respected for their gaitors, gloves, hats,

etc. and I think their outerwear will follow suit. I am about to spring

for last season's OR Maestro down jacket which is on clearance on several

websites. At least on paper it stacks up to most of the 800-fill power,

quantum pertex shelled down belay jackets.


For a soft shell I wear a Rab Baltoro. I picked it up on clearance as

well. Does SteepandCheap.com ship to Canada? While I haven't used any

others, I can say that I really enjoy the Rab. Originally a soft shell

skeptic, it won me over. For soft shell pants, I am in love with my Wild

Things Mountain Guide pants. On one of my first winter overnights I

experienced some layering errors and ended up sweating into and soaking

much of my insulating layers. Those mountain guide pants wicked and

evaporated everything and stayed dry as a bone. My Rab jacket froze into a

solid lump when I swapped it out for my down hoody and hard shell on the

wind-blown summit.


Regards,

Tony


My weapon of choice is the Haglöfs fang. Sadly as far as I can tell it is

discontinued. I will just give you a short list of features I really liked, the

material, weight, etc. are on the web anyway.


+A huge hood, a meteor 3 fits nicely, is 4 way adujstable

+pit zips for dumbing heat ( I tend to sweat like a pig)

+the most durable softshell I had so far


Not much of a review but worth a look if you see one on sale, I'm 190cm and 78kg

and have L, if you want to wear some extra layers XL is fine too.
Bert


Saturday, October 8, 2011

Snow and Rim Brakes, Derailleurs, Etc.

Snowy Streets, Cambridge MA
There are good reasons to recommend snow-proof bikes for winter cycling: powdercoat, hub brakes, internal gearing, single speed fixed. However, some prefer to stick with a regular bike through the winter, eitherforspeed, economy or other reasons. That is my situation right now, and so far even limited riding in the snow has given me a pretty good showcase of things to watch out for. Here are some of them:


Snow and rim brakes:

This is an important one for safety. If you ride through snow and it builds up on your wheel rim, you can lose braking power on a bike with rim brakes. After riding through snow, I try to remove it from the front rim as soon as I notice any build-up, before it has a chance to freeze. This can be done fairly quickly: First I bounce the front wheel forcefully, then spin it as I wipe the snow off with a gloved hand.


Snow and the derailleur:

If your bike has derailleur gearing and you get the derailleur covered in snow, it can solidify and impair shifting. I was surprised to see how quickly snow can build up and freeze around that area; I guess there are a lot of convenient nooks and crannies for it to get into. To remove it, I shake off the rear wheel and free the derailleur from buildup with gloved fingers. I also try to stay in a low-ish gear in case the shifting goes. I would be reluctant to leave a derailleur-geared bike locked up outdoors in the snow for any length of time without some sort of cover.


Fender clearance:

This is not a popular opinion to have in transportation cycling circles, but fenders can be a pain. Unless there is a generous (as in vintage 3-speed/ Dutch bike type of generous) amount of clearance between the fender and tire, snow can get in there and does not always want to come out. If enough snow builds up, it can slow down the wheel's rotation or even bring it to a halt. I have experienced this on a couple of bikes now (granted, after intentionally riding them through snow for fun), bikes with what is considered good fender clearance for paved and dirt road riding in normal weather. Once snow gets between the tire and fender, it can be fairly difficult to remove on the road in cold temperatures; it doesn't want to be coaxed out. Better to avoid riding through soft snow in the first place.


Salt and rust:

Bicycles that are finished with anything but the hardiest powdercoat are susceptible to rust from the salted winter streets. The damage starts out as cosmetic - which is in itself sad if you have a nice bike -and can grow to become structural over time. I wipe my bike down after every ride on salted roads to avoid this. I would not leave a delicately finished bike outdoors in the winter for any significant length of time.


While not ideal, it is not impossible to ride a liquid painted, derailleur-geared bike with rim brakes and less than generous fender clearances in the snow, if you take care to watch for build-up en route and if you maintain the bike afterward. Storing such a bike outdoors in the snow is more problematic. Your bike parking situation at home and work could be the determining factor in whether going without a winter-proof bike is doable.

Friday, October 7, 2011

Baby Horse


I'm not writing about my trip today. On Saturday my neighbors had a surprise waiting for them when they went to feed their horses. They knew the mare was expecting but didn't think the baby would come this soon. She has some strange markings on her face but is really cute. It was cool and there was a storm coming so we put a jacket on her to help keep her warm as none of the feedstores in our area had regular foal blankets. She and her parents are probably more Mustang than anything else

Thursday, October 6, 2011

Parson Jones


Parson Jones, originally uploaded by ParsecTraveller.

Redwoods are tall trees. Really tall trees. Sometimes so incredibly tall that they dwarf anything nearby...including other redwoods.

This tree is named Parson Jones, and is found in Armstrong Redwoods State Park. At 310 feet tall, it's one of the biggest trees in the area...truly an amazing sight!

'So My Husband Wants Me to Get a Bike...'

Since the start of the Spring season, I have been getting emails from women that read something like this:


My husband/boyfriend is a cyclist and he wants me to get a bike so that we can ride together. I am not very good at cycling, or sports in general. What bike do you recommend? My husband/boyfriend sent me a link to your blog and said that you would know.


Nice. Notice that the phrasing is not "I would like to get a bicycle so that I can accompany my husband/boyfriend on rides," but that the desire and intent are attributed entirely to him. This is something he has probably been convincing her to do for a while, and finally he sent her to my website, as if to say "See? Other women can do it!" (Great way to make her hate me, fellows!)


Of course if he does succeed in convincing her to buy a bike and join him, I can already see how that will go. He: the man dressed like a professional racer on a $2,500 road bike. She: the woman in ill-fitting bike shorts, cotton tank-top and sneakers, on a $600 hybrid. He: stern and professorial, explaining the importance of proper cadence and posture in a tireless monologue. She: red in the face and panting, sneaking longing glances at the families picnicking on the grass. Eventually it ends in bickering and tears - or worse, a fall. I see this on the local trails all the time. Please, don't be that couple.


If you are a cyclist and want to share your favourite pastime with your spouse, that's fantastic. But please understand that in order for someone to enjoy cycling as much as you do, the interest must come from within - and that you are essentially killing any chance of that happening by pushing too strongly or making the person's first cycling experience too difficult and stressful.


So what should you do instead? Well, for starters don't try to be your spouse's teacher or mentor. Unless she has absolutely never pedaled a bike before, there is no need to "instruct" her, as tempting as that may be. Even if you think she is "doing it wrong", leave it. She did not sign up for a bicycle course; she just wants to have fun with you out in nature. Give her that, and she will associate cycling with the nice time she had - and therefore will want to do it again.


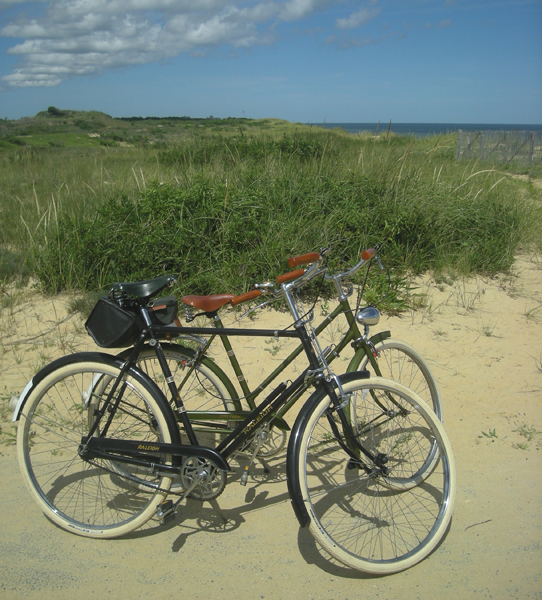
Also, even if you have been cycling since age 5 and can compete in timed half-centuries in your sleep, consider downplaying your prowess and adapting a "leisure cycle" mode. Don't kit up. If you have an old beater bike, ride that when you are together instead of your super-fast roadbike. I would even go so far as to suggest buying an old vintage upright-ish bike for yourself, to match the level of the bike your spouse will be riding. This will even out the playing field between the two of you and will make you less intimidating.


In general, I think that getting your spouse to cycle is not about what she should do to keep up with you, but about what you should do to make her comfortable with her current level of skill. If it's going to work, that's the only way. Only if she enjoys cycling, will she become motivated to improve her skills, and perhaps will even start asking you for advice - giving you plenty of opportunity to play "coach" when the time comes for it. But that initial enjoyment is key, and it is up to you to set things up in a way to make it happen. Think about it from that perspective, start slow, let her figure things out for herself... And perhaps before you know it, your special lady might delight you by becoming a bona fide obsessed cyclist, entirely on her own accord. She may even start a blog.

Monday, October 3, 2011

Chamois Creams: a Comparative Review

Chamois Creams Comparison
One of the first cycling-specific products I began to use when I started riding for longer distances, was chamois cream. Pronounced "shammy cream," this type of product is applied either directly to the crotch or to the inside of bicycle shorts (or underwear), in order to reduce chafing. The creams also have soothing, wound-healing and antibacterial properties that feel nice and help prevent infections. I have extremely rash-prone skin and I am prone to UTIs, but using chamois cream has virtually eliminated these problems. I go through the stuff fairly quickly, using up a tube every 1-2 months when I ride regularly. I have tried a handful of different brands. When I run out, I usually buy whatever the local bike shops sell, which can vary. A couple of the creams I've gotten based on friends' recommendations. Here is what I think of the ones I've used over the past 3 years:


Chamois Butt'r Eurostyle

I will start with Chamois Butt'r, which was the first cream I tried. It is available in two versions: regular and "eurostyle" - the former being non-tingly and the latter tingly. I bought the regular version first, and it did not work for me all that well; I found it somewhat bland and not entirely effective in preventing chafing unless I used a huge amount. It also did not stay effective for very long - maybe an hour tops. So next I tried the eurostyle and liked it a lot better; it did a better job preventing chafing than the regular version and lasted longer. It is worth noting that some people can't stand the tingly/cooling types of chamois creams and find that they burn or itch, so be careful. However, I do not have this problem and prefer the cooling creams.


The consistency of Chamois Butt'r is medium-thick.Ingredients of the eurostyle version include witch hazel, aloe and menthol. But the dominating scent is oddly medicinal rather than herbal. While not my favourite cream, the eurostyle Butt'r does the job. I also like that it comes in smaller tubes, making it easy to keep in a jersey pocket in case you need to reapply in the course of the day.


DZ Nuts Chamois Cream

I tried DZ Nuts because it was the only cream a nearby bike shop carried when I ran out and needed more. I remember distinctly how reluctant I was to get it, because the packaging put me off (the image just says "crotch on fire" to me). But once I tried it, it became my preferred product. DZ Nuts has a cooling feel similar to the eurostyle Chamois Butt'r, except it works better for me and the effects last longer. The soothing and healing properties are excellent, and I have even used it to soothe sunburn and rashes outside the saddle area.There is now a woman's version of this cream (Bliss) and I tried a sample at some point, but did not care for it. They basically eliminated the cooling effect for the women's cream.


The consistency of DZ Nuts is on the thin side, similar to body lotion. Ingredients include tea tree oil, sandalwood, barley extract and menthol - which the scent reflects. The scent is pretty strong and that might put some people off, but it does not really bother me. I like that this cream comes in a tube, though I wish a smaller size was available.


Vaseline as Chamois Cream

While Vaseline/ petroleum jelly is not marketed as a chamois cream, it can work in that capacity. I learned about this on Rivendell's website (here is the article) and decided to try it, since it's so much less expensive than actual chamois cream and readily available in any drug store. Vaseline both lubricates and heals. There is no tingling to bother those who are sensitive to it, there are no ingredients than can irritate, and the smell is more or less neutral. When traveling long distance, a cyclist can stop at any pharmacy and get some.


However, the problem I found with Vaseline is that it can seep through bicycle shorts (especially if they are unpadded) and discolour or otherwise damage leather saddles. It can also discolour the shorts themselves, leaving grease-like stains that resist removal. I stopped using Vaseline fairly quickly for these reasons despite its effectiveness and low cost. But I would still use it in an emergency, and I often use it post-rides.


Mad Alchemy Chamois Creme

Mad Alchemy is a local-to-me company. Their chamois cream is all-natural, paraben-free, and US-made in small batches. So far I have tried the Pro+ and the LaFemme versions of the cream. They both feel markedly different than the mass-produced creams, especially the texture and smell - both are somewhere in between the filling of lemon pie and old-fashioned cold cream. It looks whipped, semi-transparent and almost luminous. As far as chafing prevention, I find the Pro+ version more effective than the LaFemme. The Pro+ has a mild tingly effect and combines some of the properties I like in DZ Nuts and eurostyle Chamois Butt'r, but suspended in a different type of base.


The consistency of the Mad Alchemy Pro+ is medium-heavy. Ingredients include grape seed, tea tree, sweet orange and lavender oil. The scent reflects this, but is very mild. While I like everything about the Mad Alchemy cream in itself, I find the packaging inconvenient as I can't carry it in a jersey pocket and reapply when necessary. I wish they made a version in a tube.


Sportique Century Riding Cream

I bought the Sportique Century Riding Cream on the recommendation of a friend, who rides long distance and is crazy about it. I was complaining that no saddle seems to feel comfortable to me after 60 miles or so, and she recommended liberally applying this cream as a solution. I did, and I wish it worked. The cream is described as anti-microbal and anti-fungal. But honestly, it just feels like thick moisturising lotion. Sure, it prevents friction if I absolutely pack my shorts with it, but the effect fades fairly quickly and I do not experience the healing and soothing properties as I do with the creams I prefer.


The consistency of theSportique is medium-heavy. Ingredients include shea butter, wheat protein, sweet almond oil and beeswax. The scent is heavy on the shea butter and quite strong, almost candy-like. While this creammight work wonders for some, it is not for me.


Rapha Chamois Cream
I tried the Rapha chamois cream over this past winter. I forgot to apply my own cream before a long ride, and a local shop had it in stock as a new release. Like many Rapha products, this cream has a whole romantic narrative attached to it ("...inspired by the flora around Mont Ventoux") and comes in some pretty fetishistic packaging including a slender tin jar with raised lettering. But this aside, the product works very well for me: It cools, soothes, prevents chafing and its effectiveness lasts a surprisingly long time (possibly the longest of the chamois creams I've used).


Consistency ismedium-thin, similar to DZ Nuts. In the jar it resembles the original Noxema face cream I used as a teenager. Ingredients include glycerine, shea butter, menthyl and rosemary extract. However, it smells rather aggressively of pine - which I can't stand in any context other than on actual pine trees. So while I like the cream quite a lot, my dislike of the smell prevents me from purchasing it again. That, and the pretty jar is awkward to carry in my jersey pocket.


Boudreaux's Butt Paste

Boudreux's Butt Paste is the product Pamela Blalock recommends, so of course I had to try it. I ordered myself a sample and am not sure what to make of it. Not an actual chamois cream but a diaper rash treatment, the consistency and smell are like nothing else I can reference. Ingredients include zinc oxide, boric acid and castor oil. The scent is medicinal and odd; I can't really place it. While mildly unpleasant, it is not overbearing. The colour is tan-brown. Consistency is half way between toothpaste and putty.


True to its name, this stuff is definitely a paste and not a cream. It feels a little stiff to apply and does not spread quite as easily as actual chamois creams. The upside is that it stays put rather tenaciously. If your saddle discomfort is concentrated in a specific spot, this could be a particularly good product to use because it will actually stay in the area where you apply it. I have not yet decided whether I prefer Boudreux's over the other creams I like, but it is certainly an interesting one. And the fact that it comes in tubes of different sizes is very convenient.


All things considered, the chamois cream I gravitate toward the most is probably DZ Nuts. It works for me, it can be purchased at several local bike shops, and it's available in a tube. But as with most other products, preferences differ. I like the "euro" style creams with the tingly/cooling sensation, while others cannot tolerate them. Despite being female, I consistently prefer the men's/unisex versions of creams and don't like the women's formulas. I find tubes more practical than jars. And I am relatively indifferent about a cream's consistency and texture, while others have very specific preferences in this regard. Chamois creams differ in their properties and it may take you a couple of tries to find one you like.While some popular names are absent from this review, these are the products I've used so far and I hope my descriptions are helpful.